How To Assemble Our Container Sheds
Wondering how to assemble a container shed without getting overwhelmed? The good news is, with QLD Shade Sheds’ smart design and proven Bolt On System, you don’t need specialist welding skills or expensive equipment. Our engineered kits with the Bolt On System are designed so that everyday Aussies can complete the job safely and efficiently in just a weekend.
By following the clear steps below, you’ll create a sturdy, long-lasting weatherproof shelter that protects your containers, valuable equipment and gear for years to come.
Note: If you choose not to use our Bolt On System, welding will be required to attach base rails to containers. All welds must be performed in accordance with AS1554.1, and you’ll need to refer to our specific Engineering Certificate for weld types and locations.
Explore our full range of container sheds here.
What you’ll need before starting
Before diving in, gather your essential tools:
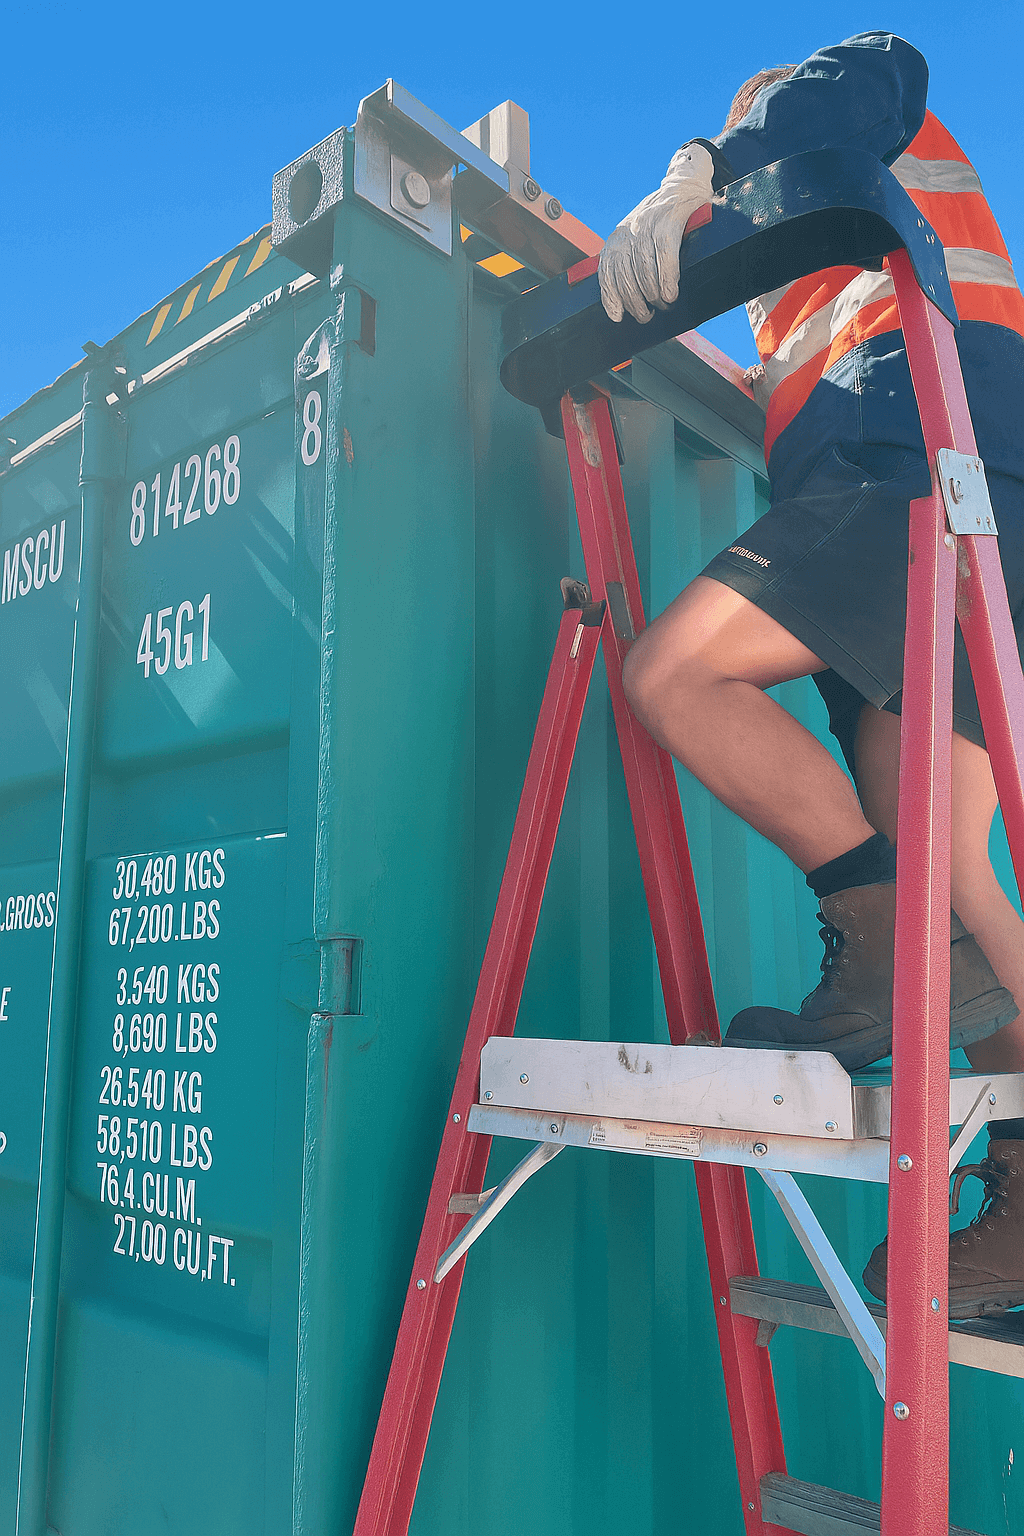
- Ladder or suitable access equipment
- Cordless Drill
- Screw gun
- Rattle gun
- Tek Screw drivers
- Shifter
- Snips
- Stanley Knife
- Measuring Tape
- Spirit Level
- Welder
- Welding equipment
- Angle grinder
- PPE/Safety Gear
Just as important, ensure your shipping containers are positioned according to the set of drawings supplied with your kit.
Step-by-step container shed assembly
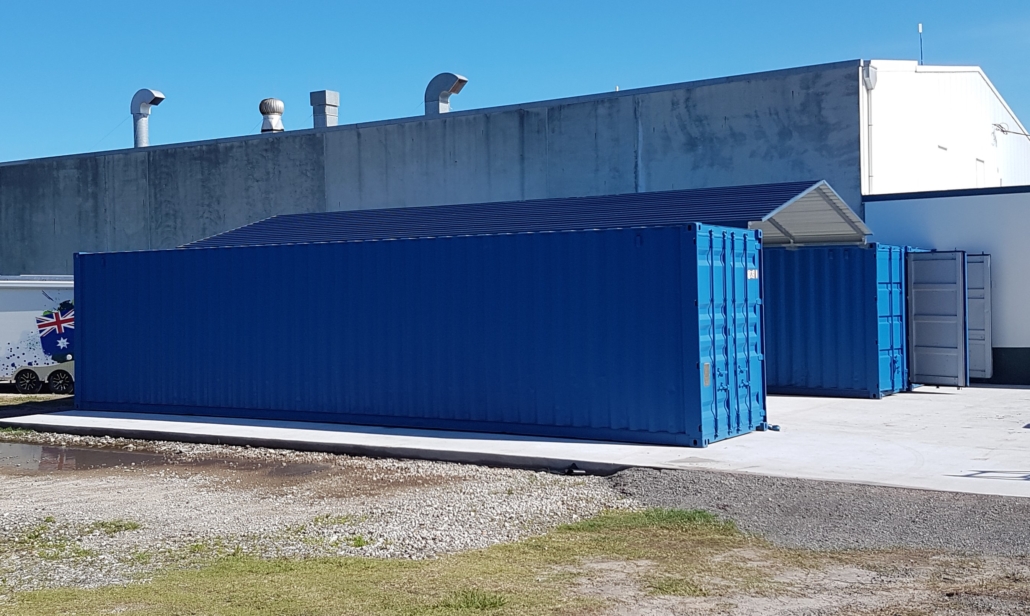
Step 1: Position your containers
Start by placing your shipping containers exactly where shown in the set of drawings supplied with your kit. These measurements are crucial for proper alignment and structural integrity. Double-check distances and ensure containers are level.
Step 2: Install base rails
Next, secure the base rails to the top of your containers – they form the foundation of your shelter system. These can be either welded or bolted onto your containers, depending on your preference and skill level. Most DIYers opt for bolting as it requires no special welding equipment.
Step 3: Create portal frames
This is where our patented Easy Sleeve Connector System makes your life easier. Join rafters and sleeves together, then secure with Framing Screws to create a complete portal frame. Repeat until all portal frames are assembled.
The Easy Sleeve System eliminates complex connections. Simply slot the pieces together and secure.
Step 4: Lift and secure portals
Carefully lift each completed portal onto the spigots on your base rails. Having a helper with you at this stage makes things quicker and safer. Once positioned, secure each portal with the provided screws.
Step 5: Install roof sheeting
Fasten the full-length COLORBOND® roof sheets to the portal frames with the sheeting screws provided. Consult the supplied drawings for specific screw types and locations, and work systematically from one end to the other. Longer sheets simplify installation and provide a cleaner finish due to fewer joins. However, for sheets exceeding 13m in length, they may be split for easier transportation.
Step 6: Attach side flashing
Install the side flashing along the edges where the roof meets the container walls. Secure it with tek screws at regular intervals to create a weatherproof seal.
Step 7: Complete with end flashing
Finish the build by attaching the end flashing to cover the gable ends.
Fix it in place with tek screws to give your shed a neat, professional appearance, and provide the all-important complete weather protection.
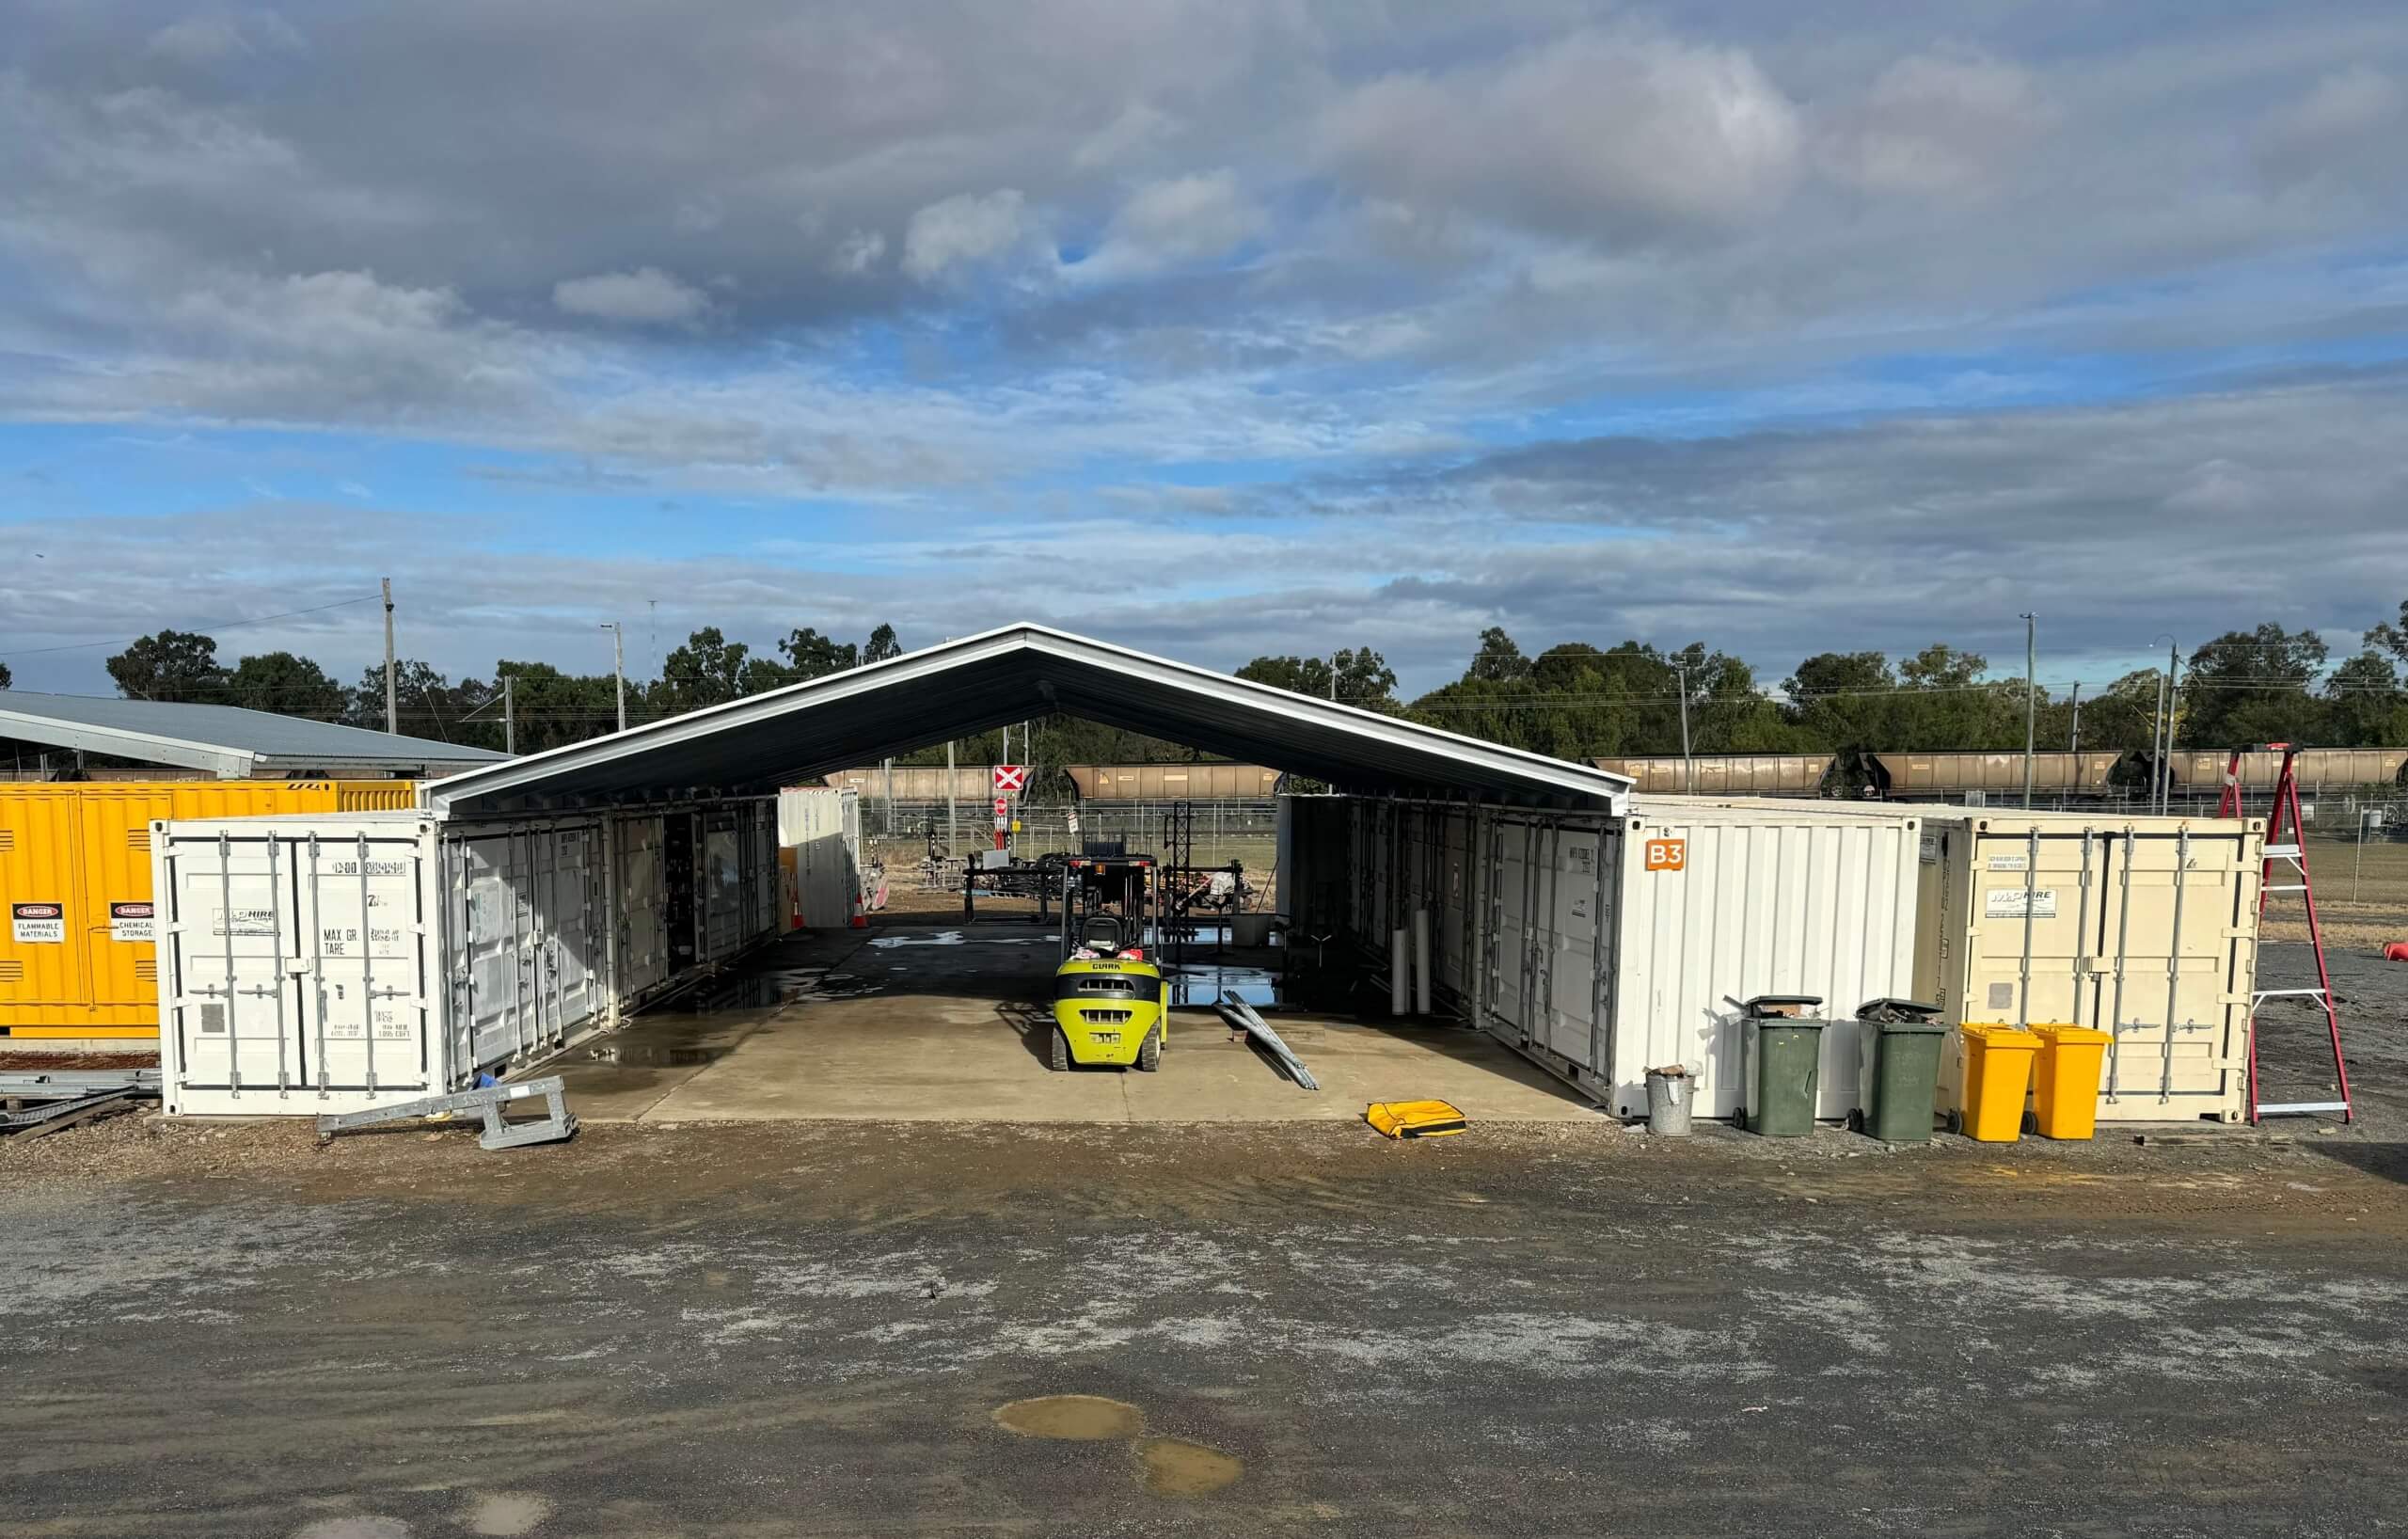
Real customer success stories
A Sunshine Coast logistics company required a quick industrial storage solution for two 40-foot containers. Their maintenance team assembled the 12m x 17m structure in just two days, creating immediate weather protection for valuable inventory. The feedback they gave us was that installation was easy, quick and stress-free, “The Easy Sleeve connections made everything click together perfectly.”
The Sunshine Coast team’s experience highlights just how straightforward our system can be when the steps are followed correctly. Their quick, stress-free assembly shows that even large structures can be installed efficiently with the right preparation.
Professional tips for success
- Take your time and double-check your measurements before fixing anything in place, as accuracy here prevents headaches later
- Choose good weather to make lifting and sheeting easier
- If you’re unsure, call our technical support team on 1300 753 742, as we know our sheds inside out
Proper assembly techniques are crucial for ensuring the longevity and structural integrity of steel structures. And, following manufacturer guidelines is both recommended and essential for warranty coverage.
Why choose QLD Shade Sheds container systems
Our container sheds combine over a decade of business experience with modern engineering. Every component is made from high-quality Australian materials, including DURAGAL® steel frames and COLORBOND® sheeting, ensuring you receive only premium products.
Unlike imported systems, our sheds are designed, manufactured, and supported right here on the Sunshine Coast. Built to handle the harshest Australian weather, they are specifically engineered for durability, with wind ratings covering Regions A, B or C, so you can trust your investment to withstand local conditions year after year.
Learn how to keep your shade shed in top condition with our maintenance guide.
Ready to start your project?
Our Sunshine Coast team stands ready to support your project, from planning through to completion. Every kit comes with easy-to-follow instructions, however if you need additional support, our technical support line connects you directly with experienced professionals who understand exactly what you’re building.
Call our friendly team on 1300 QLD SHADE or 1300 753 742 for expert guidance, or get in touch to find out more today.